Skills · boat setup
Inflating a packraft
A firm packraft tracks straighter and turns more readily than a soft one. Once you know the routine, getting it there takes about ten minutes, and keeping it there takes a few breaths at every stop.
Last checked November 2026
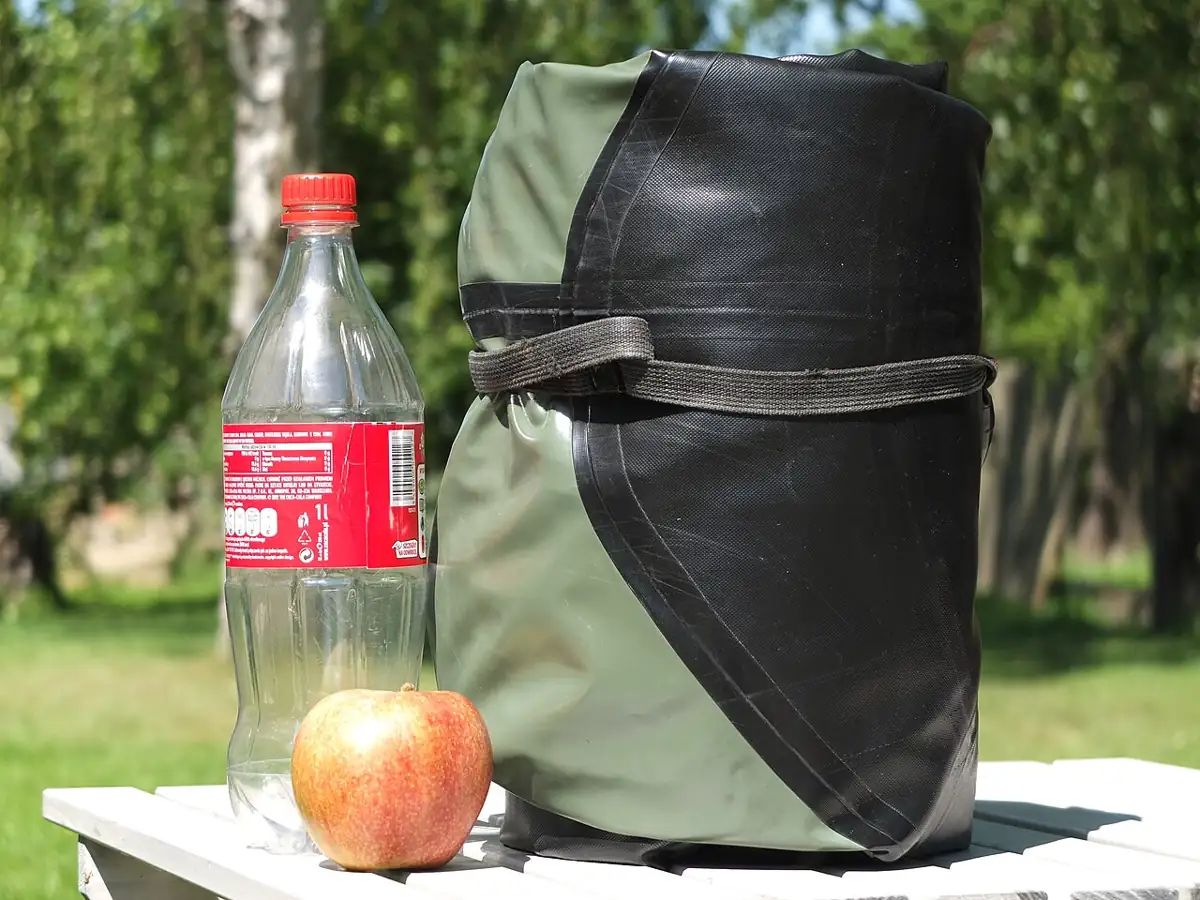
Most packrafts have no foot pump and no electric pump. They fill from an inflation bag: a light, roughly 20-liter sack of coated fabric with a threaded or bayonet fitting that screws into the boat's main valve. You trap air in the open end, close it off and squeeze that air into the tube. It looks clumsy the first time and is easy by the second.
The bag works because a packraft runs at very low pressure. A bike tire needs a pump that compresses air; a packraft only needs a large volume of air moved gently into the tube, and a big sack does that faster than any small hand pump. The last bit of firmness comes from your lungs through a small oral valve. If you are new to the boat itself, the beginner primer explains the parts before you start.
Before you start
Pick a spot clear of thorns, sharp shale and cactus, and put down a ground sheet or your PFD on coarse gravel. Unroll the boat fully, flat side down, and make sure the inner valve flap is open (on most designs you push the one-way flap in or turn it so it does not seal shut). Check that the top-up valve and any cargo zipper are closed. When a boat "won't fill," a partly open cargo zipper is usually the reason.
A quick pre-inflation check
Boats with an inner-tube cargo zipper store gear inside the tubes, and the zipper has to be closed with care: slide it all the way home and keep sand out of the teeth. A zipper that is a few millimeters short of sealed lets air out as fast as you can put it in.
The steps
- Screw the inflation bag onto the main valve until it seats firmly.
- Hold the open end of the bag wide and swing or walk it into the wind so it fills with air.
- Twist or roll the open end shut to trap the air inside.
- Press the trapped air down into the boat by squeezing the bag against your body or kneeling on it gently.
- Repeat until the bag will no longer empty easily, usually after five to ten fills.
- Remove the bag, close the main valve and screw its cap tight.
- Top up through the small oral valve with a few deep breaths until the tubes are firm.
On a calm day you can fill the bag by scooping it through the air in a big arc. On a windy day, hold it open into the breeze and let the wind do it. Do not blow into the main valve by mouth for the whole fill; breath adds moisture that can grow mildew inside the tubes.
Technique notes that speed it up
- Roll the open end at least three turns before squeezing. Fewer turns and the air leaks back out the top.
- Push with your body weight. Hugging the bag against your chest or kneeling on it moves more air with less effort.
- On the last few fills the bag resists. Stop there and switch to the oral valve instead of fighting it.
- Keep the boat in the shade while you work if the day is hot, so the reading you get by feel matches what it will be on the water.
- Two people can share one bag: one fills, one squeezes. It is faster than two people each working their own boat on a gusty beach.
How firm is firm enough
Packraft tubes run at very low pressure compared to a whitewater raft. Squeeze the side tube between your thumb and fingers. It should dent only slightly and spring back. A soft tube folds under waves, slows the boat and lets the floor sag under your seat. An overfilled boat sitting on hot sand in the afternoon sun can stretch seams, so let a little air out if you leave it in direct sun on shore.
Most makers do not print a pressure figure, and few packrafters carry a gauge. The thumb test is the standard. If you want a second check, sit in the boat on land: the side tubes should hold their round shape when you lean on them with an elbow, and the stern should not crease behind your back.
| Situation | What happens to the air | What to do |
|---|---|---|
| Launch into cold snowmelt | Air cools and contracts, the tubes soften | Top up by mouth after 5 to 10 minutes on the water |
| Boat left in hot sun on shore | Air warms and expands | Open the top-up valve briefly or move the boat to shade |
| Climbing over a high pass | Lower outside pressure, tubes feel firmer | Usually nothing, just avoid overfilling at the trailhead |
| Long flat-water crossing | Small leaks or valve seepage show up | Recheck firmness at each break |
Top-ups on cold water
Cold water is where most boats go soft. You inflate on a warm beach, launch into a river fed by snowmelt, and within minutes the tubes lose their snap as the air inside cools, even though nothing has leaked. The fix is a quick routine:
- Inflate to firm on shore as usual.
- Paddle for five to ten minutes so the air inside reaches water temperature.
- Pull into a calm eddy or onto a gravel bar.
- Open the oral valve and add a few breaths until the tubes pass the thumb test again.
- Recheck after lunch or any long stop in the sun, since the boat may have warmed and firmed up while it sat on shore.
The pattern reverses at the end of the day. If you pull out onto a sun-baked beach in the afternoon, the cold air inside warms and expands. Let a little out or drag the boat into shade. If you are dressing for snowmelt yourself, the cold-water safety page covers what a sudden swim does to your body.
Seat and backrest
Most packrafts use an inflatable seat and a separate backrest. Inflate the seat less firmly than the main tubes: a slightly soft seat lets you sit lower and makes the boat more stable. A rock-hard seat raises your center of gravity. If your boat has a backband or thigh straps, adjust them after the boat is fully inflated, then sit in it on land to check the fit.
Seat height changes how the boat handles. Try a few settings on flat water before a river trip:
| Seat setup | How the boat feels | Good for |
|---|---|---|
| Soft seat, firm backrest | Low and stable, a little sluggish to turn | Lakes, loaded touring, first outings |
| Medium seat, snug backband | Balanced, easy to edge with thigh straps | General river running |
| Firmer seat | Higher view of the water, more tippy | Reading a rapid ahead from the boat, short stretches only |
If you add a spray deck, set the seat first, then fit the deck, because a higher seat changes how the deck sits around your waist.
Deflating and packing
Open the main valve and push the inner flap open so air can escape. Fold the boat in half lengthwise, then roll it from the stern toward the open valve, pressing air out as you go. Close the valve before the last roll so air does not seep back in. If the boat is wet and you are on a multi-day trip, shake off as much water as possible and dry it at the next chance; at home, follow the drying and storage routine before long-term storage.
How you fold depends on how you carry the boat. For a backpack, a tight roll about the width of the pack slides in vertically along your back. For a bike, a flatter, longer roll strapped to the handlebars is easier to balance, and the bikerafting setup guide shows how people mount it. Avoid folding along exactly the same lines every time over many seasons, because repeated sharp creases wear coatings.
When it won't stay firm
Slow softening that is not explained by cold water usually comes from the valve, not the fabric. Check that the valve cap is threaded straight and the rubber seal is clean of sand. Then listen and feel along the seams, or brush soapy water on suspect spots and look for bubbles. Small holes are easy to fix in the field; the repair guide covers patches. For more on inflation bag types and backup pumps, see the gear page on bags and pumps.
Troubleshooting by symptom
| Symptom | Likely cause | First thing to try |
|---|---|---|
| Boat never gets firm | Cargo zipper or main valve not sealed | Close the zipper fully; reseat the valve flap |
| Soft after an hour on cold water | Air cooled, no leak | Top up by mouth, recheck at the next stop |
| Soft overnight on shore | Valve seepage or pinhole | Soapy water on the valve and seams |
| Hissing near the valve | Grit under the seal or cap cross-threaded | Rinse the threads and screw the cap on straight |
| One spot dents more than the rest | Fabric damage or a delaminating seam | Inspect closely; patch, or retire the boat from rough water |
A peeling seam needs a different fix from a pinhole. The page on fabrics and seams explains how welded and glued boats differ and what a failing seam looks like.
Once the boat is firm and fitted, the strokes page covers moving it where you want. Other topics are in the full list of packrafting skills.
How many inflation bag fills does a packraft take?
Usually five to ten, depending on the size of the boat and the bag, followed by a few breaths through the oral valve.
Can I inflate a packraft with my mouth only?
You can, but it takes much longer and puts moisture inside the tubes. Use the bag for the bulk of the air and your breath only for the final top-up.
Why does my packraft go soft on the river?
The air inside cools to water temperature and contracts. Top it up after the first few minutes on cold water; it is normal and not a leak.
Is it bad to leave a packraft inflated in the sun?
Warm air expands and raises the pressure. Short spells are fine, but in strong sun let a little air out or move the boat into shade.
Do I need an electric pump?
No. An inflation bag fills most packrafts in about ten minutes. Some people carry a small pump for convenience at the car, but it is not needed.