Skills · beginner primer
Packrafting 101
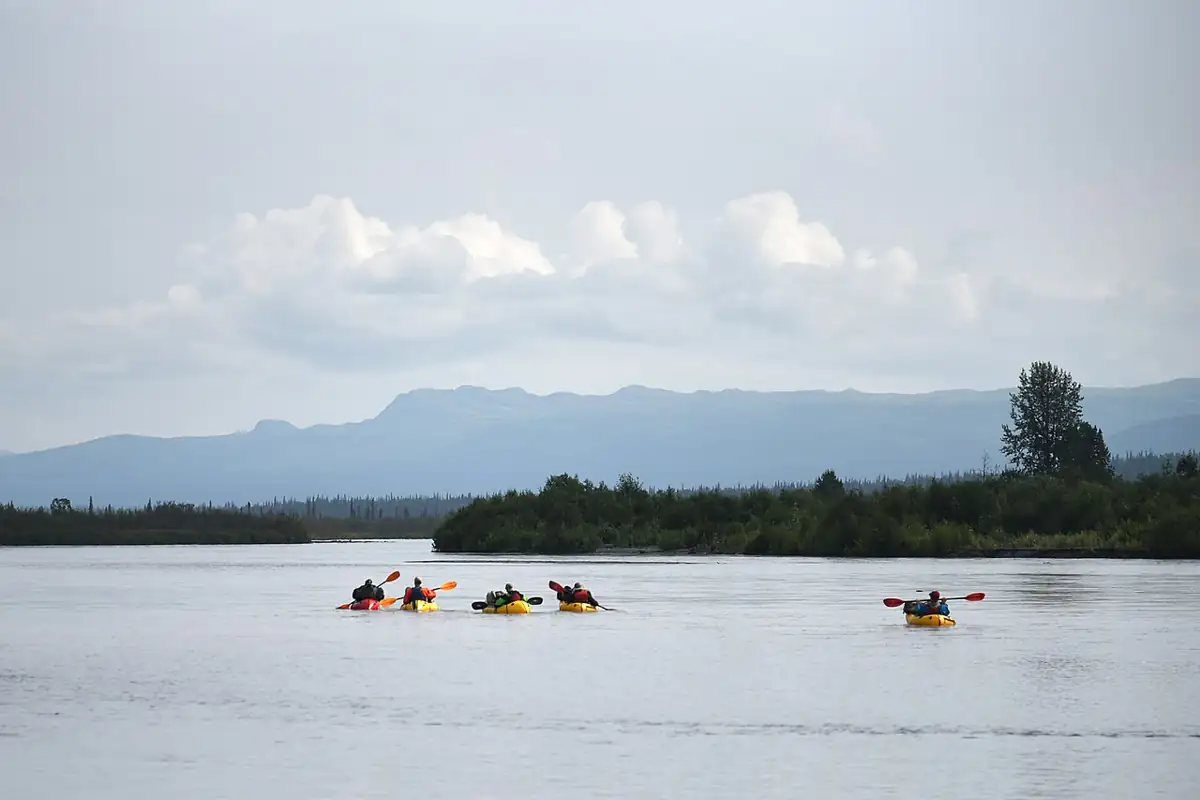
A packraft is a small inflatable boat you can carry in a backpack. This primer takes you from an empty boat on the floor to a first easy day on the water, then lays out a season of learning after that.
Last checked November 2026
What a packraft is
A packraft is a one-person (sometimes two-person) inflatable boat built to be carried. Most weigh somewhere between three and ten pounds, roll up to the size of a sleeping bag and are paddled with a four- or five-piece kayak-style paddle. You sit low on the floor with your back against the stern tube, legs forward. The low seat makes it stable, so most first-timers feel at home within an afternoon.
People carry packrafts so they can walk to water, float it and walk on. Hikers use them to cross lakes and link valleys, bikers strap them to handlebars, and whitewater paddlers carry them up to creeks that a hardshell kayak could never reach. There are more examples in what people do with a packraft.
Light open boats suit lakes and flat rivers. Whitewater models add a longer stern, more rocker, thigh straps and often a spray deck. The guide to boat types explains the differences, and the page on whitewater-specific packrafts covers what changes once you start running rapids. If you are choosing a first boat, the notes on packraft sizing matter more than most spec sheets: a boat that is too long for your legs is hard to brace in, and one that is too short folds your knees up.
How it differs from other small boats
A packraft is shorter and wider than a kayak and has no keel, so it spins easily and won't hold a line on its own. That helps in rocky rivers and gets annoying on a windy lake. It sits on top of the water, so it bounces off rocks that would stop a canoe and a headwind can push it backward. You will work harder than a kayaker on long flat stretches and have an easier time in tight, shallow water.
The kit
Nothing replaces the life jacket. Wear it buckled and snug it so it cannot ride up over your ears; the page on choosing a PFD covers fit. Dress for the water rather than the air. Snowmelt rivers in June can be in the 40s °F while the air is 80, and that is where a drysuit or wetsuit earns its weight. Add a helmet as soon as rocks are part of the picture.
| Item | Lake or flat water | Easy moving water (Class I to II) | Why it matters |
|---|---|---|---|
| Life jacket | Yes | Yes | A USCG-approved PFD, worn and buckled, every time |
| Paddle | Yes | Yes, plus a spare in the group | Losing one on a river leaves you hand-paddling |
| Inflation bag | Yes | Yes | Needed again for top-ups during the day |
| Repair kit | Yes | Yes | Tape and patches fix most small holes on the spot |
| Insulation for a swim | Depends on water temperature | Wetsuit or drysuit in cold water | A cold swim drains strength fast, even on easy water |
| Helmet | Rarely | Yes | Swims in shallow rapids put your head near rocks |
| Throw bag | Optional | At least one per group | The basic tool for getting a swimmer to shore |
| Whistle and knife | On the PFD | On the PFD | Signals over river noise; cuts tangled line |
| Dry bag with spare layer | Yes | Yes | A dry fleece to change into after a swim |
A fuller version, including overnight gear, is on the packing list page. For shoes, the footwear guide explains why sandals that slip off are a poor choice for swimming.
Inflating
Most packrafts fill from an inflation bag, a light sack you scoop full of air, roll shut and squeeze into the valve. Five to ten bags will fill the boat; a few breaths by mouth through the top-up valve finish it until the tubes feel firm when you press them with your thumb. Air cools and contracts in cold water, so top up again after a few minutes afloat. The full method is on the inflation page.
Launching
Find a calm spot with a gentle bank. Put the boat in the water parallel to shore, sit on the side tube, then swing your legs in and slide down onto the floor. If you are on a river, point the bow slightly upstream so the current does not spin you before you are ready.
Getting out works the same way in reverse. Pull up parallel to the bank, put a hand on shore, swing your legs out and stand up only once your feet are on solid ground in still, shallow water. Keep a hand on the boat while you climb out. An empty packraft weighs so little that a gust can take it across a lake while you watch.
First strokes
- Forward stroke: plant the blade near your feet, pull it back alongside the boat and lift it out at your hip. Rotate your torso instead of pulling with your arms.
- Correcting: a packraft spins easily. A short stroke on the side the bow is drifting toward brings it back.
- Sweep: a wide arc from bow to stern turns the boat without stopping it.
- Back paddle: reverse the forward stroke to slow down or hold position above an obstacle.
- Ferry: angle the bow upstream and paddle to cross current without losing ground downstream.
The stroke guide adds draws, the stern pry and how to catch an eddy.
Safety basics
Most serious accidents come from hazards you can see if you know what to look for. Trees in the current (strainers), low-head dams, undercut rocks and cold water are the main ones. Learn to spot them in the guide to reading a rapid and check the grade of any run against the International Scale of River Difficulty before you go.
If you do capsize, hold on to your paddle if you can, get on your back with feet downstream and toes at the surface, and swim to the side once the water allows it. Never try to stand in fast water deeper than your knees, because a foot trapped between rocks can hold you under. The self-rescue guide shows the re-entry technique and the cold-water page explains why the first minute in snowmelt matters so much.
Common beginner mistakes
Most first-season problems are the same few, and each has a simple fix.
| Mistake | What goes wrong | The fix |
|---|---|---|
| Dressing for the air | A swim in cold water is a shock, and you are shivering within minutes | Check the water temperature and dress for falling in |
| Soft tubes | The boat folds in waves, wanders and feels slow | Top up by mouth after launch and again at breaks |
| Pulling with the arms | Tired shoulders in an hour and a boat that zigzags | Short strokes driven by torso rotation |
| Running the river at an unknown flow | An easy section becomes pushy or full of new rocks | Read the gauge and compare it with a trip report |
| Paddling alone | Nobody to help with a pinned boat or a long swim | Bring a partner, and a third boat on rivers |
| Loose lines in the boat | Rope can wrap a leg during a swim | Stow everything, no boat leash in current |
| Skipping practice swims | The first real swim is also the first time you try re-entry | Practice falling out in warm, calm water |
| Ignoring wind | A headwind on a lake can stall a light boat | Plan crossings for calm mornings and hug the shore |
Your first trip
Keep the first trip short and pick warm, slow water. A lake with a gentle shoreline, or a flat river section of two to five miles with a known take-out, is plenty. Check the current flow against what locals consider an easy level. Leave time to practice turns, ferries and a deliberate swim with re-entry. If you can, bring a friend who has paddled before.
The trip planning guide covers shuttles, permits and packing. The Colorado trip notes include a few gentle sections that work as early outings.
A worked example: a half-day float on easy water
Say you and a friend have picked a four-mile Class I stretch of slow river with a road bridge at each end, on a warm summer weekend. The day might go like this.
- The night before, look up the gauge for that stretch and compare the reading with the range a local guidebook or club calls easy. Check the forecast for wind and thunderstorms.
- Leave one car at the downstream bridge and drive together to the upstream one. With one car, stash a bike at the take-out first.
- Text someone your put-in, take-out and the time you expect to be off the water.
- Inflate both boats on a patch of grass, about ten minutes each, then top them up by mouth.
- Before you launch, spend fifteen minutes in a calm spot near the put-in: forward strokes, turning in place, paddling backward.
- Float the first mile and practice ferrying from one bank to the other each time you find a smooth stretch of current.
- Halfway down, find a beach with a slow, shallow edge. One person swims out of the boat on purpose and climbs back in while the other watches from shore. Then swap.
- At the take-out, deflate, roll the boats loosely and dry them fully at home.
Budget three to four hours for four miles with practice stops.
A first-season progression
This plan assumes a few outings a month through one summer. Stretch each stage out if the water is cold or you get out less often.
| Stage | Where | What to practice | Ready to move on when |
|---|---|---|---|
| 1. Flat water | Lake or pond, warm day | Inflating, launching, forward stroke, turning, deliberate swims and re-entry | You can paddle a straight line and climb back in without help |
| 2. Slow current | Class I river with easy take-outs | Ferries, back ferries, catching big eddies, reading the gauge | You cross the current and stop in eddies where you planned to |
| 3. Easy rapids with a guide | Class II with experienced company | Reading tongues and eddies, scouting, defensive swimming, throw bag catches | You choose your own lines and swims feel routine |
| 4. Formal training | A course | Swiftwater rescue, rope work, group roles | You can help someone else as well as yourself |
Plenty of paddlers spend more than one season in stages 2 and 3, and that is fine. The Skills overview lists every page in the order this plan uses them.
What to learn next
Once flat water feels routine, move on to easy current with someone experienced. A packraft or swiftwater rescue course compresses years of trial and error into a weekend. If you have not bought a boat yet, try a rental first to work out what kind of packraft fits your plans. Look after the boat with a simple cleaning and storage habit, and work through the other skills guides as your trips get bigger. When you start camping on river trips, the page on low-impact river camping covers sandbars, fires and human waste.
Do I need to know how to kayak before packrafting?
No. Packrafts are stable and easy to learn on flat water, but moving water skills from kayaking or rafting carry over, so a course is worth it before you run rapids.
Can a packraft handle whitewater?
Whitewater packrafts with thigh straps and spray decks are run on Class III and harder rivers by skilled paddlers. Beginners should start on flat water and Class I.
How long does it take to learn?
Most people paddle comfortably on flat water after an afternoon. Reading and running easy rapids with confidence usually takes a full season or more of regular outings.
Do I need a helmet on a lake?
Usually not. Add one as soon as you are on moving water with rocks, because a swim in shallow current puts your head close to them.
Is a cheap inflatable raft the same thing?
No. Pool and beach inflatables are thin and unstable in current, and American Whitewater's safety code warns against taking recreational rafts on Class III or harder water.